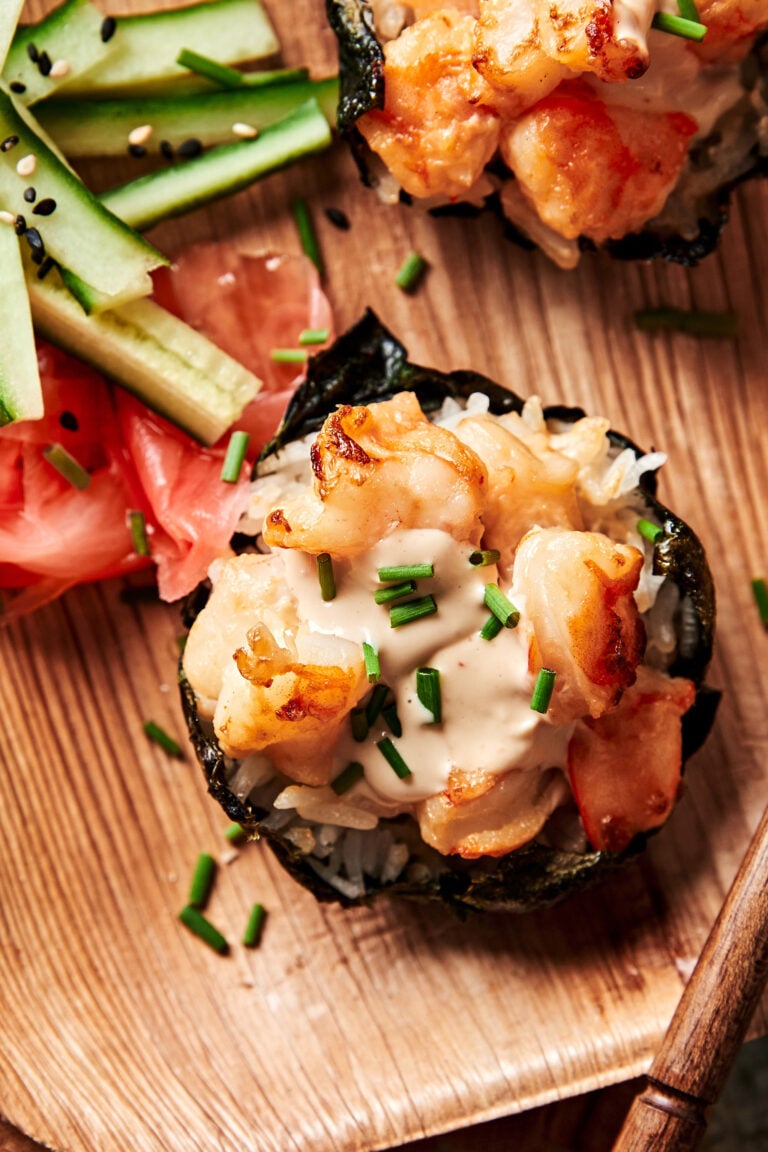
If you think the perfect, portable lunch doesn’t exist, then think again, because this recipe is about to blow your mind. That’s right, my Baked Salmon Sushi Cups are a delicious, on-the-go way to enjoy all of the flavors you love about baked sushi, but with a fun twist. These cups are loaded with tender salmon, sushi rice, and your favorite garnishes for an exciting take on the sushi bake trend. Plus, this recipe happens to be naturally gluten-free- woohoo!

Friends, who loves sushi!? If you know me, then you may know that sushi is truly my favorite food. My family and I go out for sushi about once a week, and even that doesn’t feel like enough. Truth be told, if I could eat sushi every single day, I would! But then I’d be broke…but I digress.
And let’s be honest: making sushi at home is a labor of love. In fact, it’s actually an art form that can take years to master. For a busy mom like me, I just don’t have the time to properly learn the art of making sushi, which means when I’m craving the taste of fish, tangy rice, and crunchy nori, I go to my local sushi spot to get my fix. That is, until now.
Of course when I eat sushi, RAW fish is where it’s at…that’s the point of sushi! And you can absolutely make these with raw salmon, but make sure to purchase sushi-grade salmon. If you can’t find sushi-grade salmon, or just prefer your fish cooked, MAKE THESE. IMMEDIATELY.
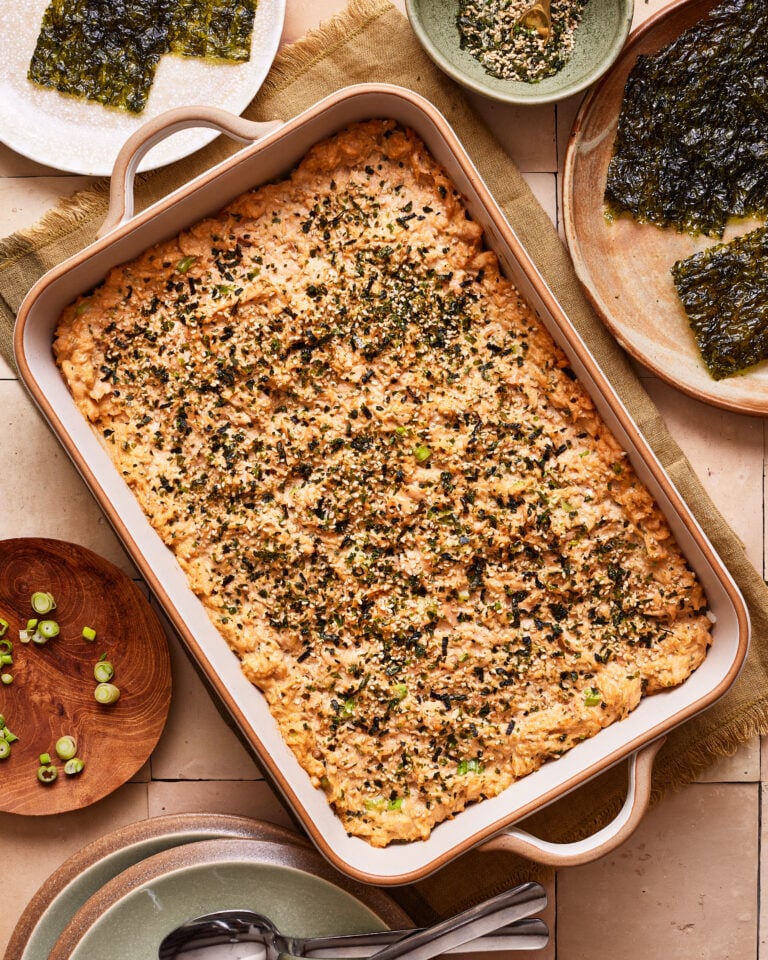
These Baked Salmon Sushi Cups are a fun and delicious take on sushi that is super easy to make from home! I first learned of this recipe from my friends @themodernnonna and @alexawhatsfordinner on TikTok and my mind was instantly blown. With sushi bakes being all the rage on TikTok these days, I loved this fun, portable, and dare I say, mess-free version of the viral trend. These cups are super easy to pop out of the tin and eat without utensils. I love these for a simple, quick, and easy lunch!


What You Need to Make These Adorable Sushi Cups
These cups come together super easy, with ingredients that you may already have on hand. They’re naturally dairy-free and gluten-free as well, and if you wanted to make them vegetarian-friendly, you could even try swapping out the salmon for tofu!
- Salmon: Of course, the star of these sushi cups is the salmon. Because we are baking the salmon, any salmon should do, although I personally always like to use sushi-grade for the highest quality. If preparing the salmon yourself, you’ll want to remove the skin and cube it. But, you can also ask your butcher to prepare it for you this way!
- Sea Salt: A little salt adds the perfect flavor to this salmon.
- Soy Sauce or Coconut Aminos: Soy sauce is essential to sushi, but if you want to keep this recipe gluten-free, you can easily swap the soy sauce for coconut aminos, tamari, or liquid aminos!
- Kewpie Mayo: Kewpie mayo is a Japanese mayo that is made exclusively from egg yolks and vinegar, giving it a fattier flavor. However, you can also use traditional mayo, or if you want to take this recipe up a notch, use my homemade mayo for the best flavor!
- Rice: Any rice really works in this recipe, although I recommend using sushi rice for the most authentic flavor and texture! Sushi rice tends to be a bit stickier, so it will stick well to the nori sheets.
- Rice Vinegar: The key to making sushi is to mix your rice with rice vinegar. You can usually find rice vinegar in the “international” aisle of your local grocery store!
- Nori Squares: If you can’t find small nori squares, you can use large nori sheets and cut them in fourths! Nori is high in iodine, an essential nutrient that our body needs.
- Garnishes: These are optional, but highly recommended! I love garnishing these sushi cups with chopped green onions, sesame seeds, and an extra squeeze of mayo.

The Easiest Way to Make These Baked Sushi Cups
Making these baked sushi cups is simpler and easier than you think! Simply start by preheating your oven to 400 F and lightly greasing a standard size muffin tin.
Next, add your cubed salmon, sea salt, soy sauce, and mayo to a large bowl. Toss to coat well, until all of the ingredients are fully combined. Then, add your cooked rice to a bowl and add in your vinegar. Mix until all of the rice is coated in the vinegar.
Prepare your nori sheets by laying them out on a countertop. If using large nori sheets, cut them into squares small enough to fit into each cavity of your muffin tin. Add about 2-3 tablespoons of your rice mixture to each nori sheet, then fold and place inside the muffin tin. Repeat until all of the cavities of your muffin tin are filled.

Then, top each nori cup with your salmon mixture. This will be about 2 tablespoons, depending on how big your salmon is!
Finally, bake your cups for 15 minutes, or until the salmon is cooked to your liking. Once done, remove from the oven, top with your garnishes of choice, serve, and enjoy! These cups are best eaten the same day, but can be stored in an airtight container, in the fridge, for up to two days.
If you make this recipe, please be sure to leave a review and rating below! And, since I practically live on Instagram, be sure to tag me in your creations so that I can repost them! xx
** Photography by Gayle McLeod
Ingredients
For the Sushi Cups:
- 1 ½ Pounds Salmon, with the skin removed and cubed
- 1 Pinch Sea Salt
- 2 Tablespoons Soy Sauce or Coconut Aminos
- 2 Tablespoons Kewpie Mayo, or try my homemade mayo recipe!
- 1 ½ Cups Cooked Sushi Rice
- 1 Teaspoon Rice Vinegar
- 12 Nori Squares
For the Garnishes:
- 1 Squeeze Kewpie Mayo
- 1 Tablespoon Sesame Seeds
- ¼ Cup Green Onions, chopped
Instructions
- Start by preheating your oven to 400 F and lightly greasing a standard size muffin tin.
- Next, add your cubed salmon, sea salt, soy sauce, and mayo to a large bowl. Toss to coat well, until all of the ingredients are fully combined.
- Then, add your cooked rice to a bowl and add in your vinegar. Mix until all of the rice is coated in the vinegar.
- Prepare your nori sheets by laying them out on a countertop. If using large nori sheets, cut them into squares small enough to fit into each cavity of your muffin tin.
- Add about 2-3 tablespoons of your rice mixture to each nori sheet, then fold and place inside the muffin tin. Repeat until all of the cavities of your muffin tin are filled.
- Then, top each nori cup with your salmon mixture. This will be about 2 tablespoons, depending on how big your salmon is!
- Finally, bake your cups for 15 minutes, or until the salmon is cooked to your liking.
- Once done, remove from the oven, top with your garnishes of choice, serve, and enjoy! These cups are best eaten the same day, but can be stored in an airtight container, in the fridge, for up to two days.

Rate & review
SELECT A RATING and tell me what you think!
What others are saying
Thanks for writing out the recipe. In the picture, the garnish looks like chives not green onion.
Hi! This recipe can be made with either one!
My family and I Love sushi and now we love these tiny sushi cups! Its got all the flavor and I didn’t have to roll anything! Yay! Thanks for this recipe!
Woohoo! I am so happy that you enjoyed it, Elaine! Thank you so much for your review!
Obsessed with these! Legit SO easy. Every time I buy salmon now, my husband asks for these salmon cups almost exclusively. Needless to say, these have become a new dinner staple in our household!
Wow! I am so happy to hear that, Liz! Thank you so much for your review!
I made these tonight and we loved them!!! Thanks for creating such tasty recipes!
I’m so glad you loved them! Thank you so much for your support, Leslie!
I made these last night but the nori shell went soggy, it was a train wreck!
Tasted nice but looked a mess.
Oh no! I’m sorry to hear that, Sue! You might want to try 2 nori sheets next time or a little less filling.
Made these twice and they came out so good! Didn’t have any vinegar so my solution was to make a bit undercooked rice and it came out perfect.
Delicious!!
Thank you so much!
Absolutely delicious!!!!!
file:///var/mobile/Library/SMS/Attachments/41/01/6F013E4B-B278-47E1-ADD6-F7FCB75139D6/IMG_3200.HEIC
I’m so happy you enjoyed it, Debi! Thank you for your review!
These
Absolutely fantastic! What would you recommend if your trying to omit rice?
Hi Georgette! I don’t recommend omitting the rice, as the rice is essential for the cups staying together.
My kids love it! Easy and fun to eat for the kids. We put avocado and cucumber on it as garnish.
Soy sauce is already gluten free unless that was a typo in the substitute section……
Hi, thanks for bringing it up! Most soy sauces do contain wheat, so coconut aminos are a great gluten-free alternative. I’ll add a note so it’s less confusing 🙂