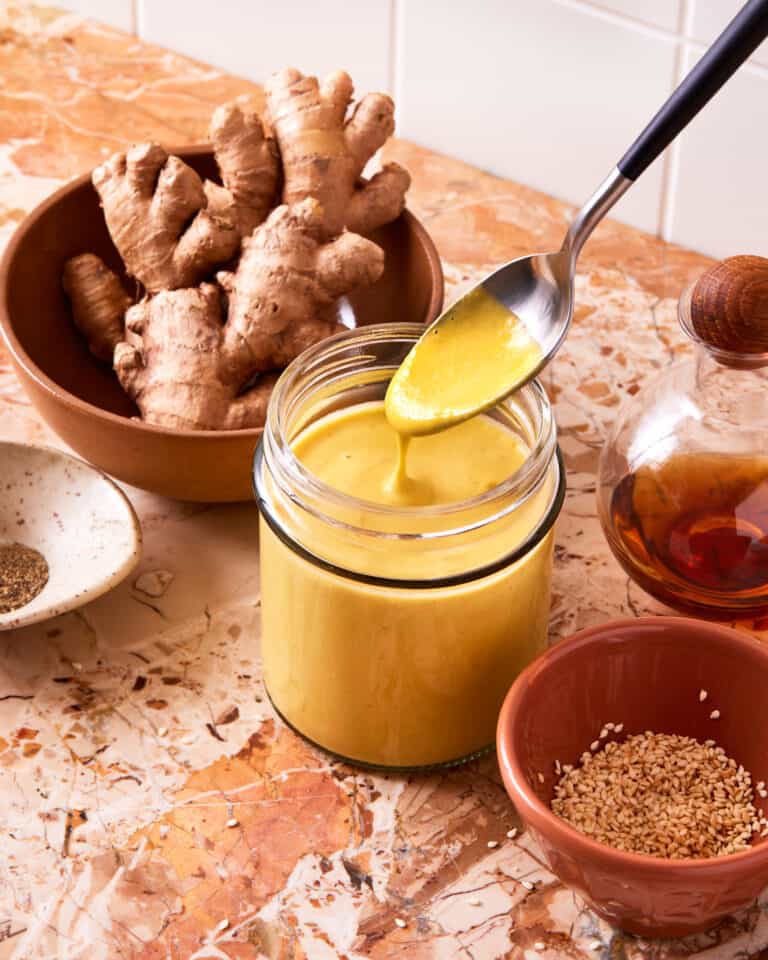
Say goodbye to store-bought mayo for good. When you taste how good my 1 Minute Homemade Mayonnaise is, you will be converted to homemade forever! This recipe comes together in literally one minute, with just a few, simple, easy, and healthy ingredients. And if you think you don’t like mayo, then you need to try this recipe. I promise, you will change your mind!

Friends, if you’ve been to my blog before, then I bet I can guess what you’re thinking: “Nicole, you’ve spent YEARS talking about how you don’t like mayo. Yet, you’re here with a mayonnaise recipe?!”
If you had told me a year ago that I would be writing this recipe, I probably wouldn’t have believed you. In fact, it was only a few months ago that I was adamant about the fact that I would NEVER make a recipe that included mayonnaise in it. It’s true!
And if you’re wondering why I’ve held such a visceral reaction towards mayonnaise for years, it’s simply because I’ve never liked mayo! It’s just one of those foods that I’ve never cared for in ANY way. And let’s be honest: store-bought mayo is one of those things that you either love or you hate. In my personal opinion, I hate it! It’s why I created recipes like my Mayo-Free Mexican Street Corn Tostadas, and my No-Mayo Egg Salad.
But, times have changed and so have I. When I finally tried homemade mayo for the first time, I was officially converted from a hardcore mayo-hater, into a mayo-lover. If you’re like me and you HATE mayonnaise, then you need to try this recipe. It may just convert you into a mayo-lover, too! 😉
Why Make Homemade Mayonnaise?!
Let’s be honest: mayonnaise tends to be one of those condiments that we don’t even think about making from scratch. Most of us, when we go to the grocery store, just end up grabbing a good ole’ jar of Hellmann’s Mayonnaise (you know which one) and slathering it on our sandwiches. And while that can work for sure, this homemade mayonnaise is next-level.
In fact, there are so many reasons to make homemade mayo:
- It’s fresh – and let’s be honest, fresh is always better. For example, think of the way bottled orange juice tastes in comparison to freshly-squeezed. I don’t know about you, but I’ve never met one person who prefers bottled orange juice over the latter. And the same goes for mayonnaise.
- It’s cheaper – one jar of mayonnaise will run you about $8 – $9 these days. But homemade mayo comes together at a fraction of the price, especially because you may already have all of the ingredients sitting in your fridge.
- It’s free from funky ingredients – while I celebrate ALL foods here, it’s common knowledge that there are certain foods that just aren’t good for our bodies. So many store-bought mayos are laden with ingredients like canola oil, added sugar, and/or preservatives. With homemade mayo, like anything else, you are in charge of exactly what you put into it, which means that you can choose to use better-for-you ingredients, instead.

What You Need to Make This Homemade Mayo
Would you believe me if I told you that you only need five ingredients to make this homemade mayonnaise?! It’s true! And with this ingredient list, it could not be any simpler.
- Eggs: Of course, any mayonnaise recipe requires fresh, ROOM TEMPERATURE eggs. If you are worried about consuming raw eggs, make sure to use pasteurized eggs. I use Vital Farms eggs, and find that they work perfectly in this recipe.
- Dijon Mustard: Dijon mustard is what gives this mayonnaise the best flavor!
- Lemon Juice: In order for your mayonnaise to emulsify properly, we need an acid. Specifically, we need lemon juice. Don’t skip this!
- Sea Salt: A pinch of sea salt makes this mayonnaise turn out like perfection.
- Avocado Oil or Neutral Oil: The main ingredient in mayonnaise is the oil, and this recipe works PERFECTLY with a neutral oil like avocado oil! I don’t recommend using olive oil in this recipe, as the flavor of the olive oil becomes too overpowering, and it just doesn’t emulsify properly. Instead, if you aren’t planning to use avocado oil, you can swap it out for another neutral oil.
Looking to Make Your Mayo Vegan? It’s Easier Than You Think!
If you are vegan and/or egg-free, then listen up because this tip is for YOU. While mayonnaise traditionally relies on eggs, there is a way to substitute them out and make this mayo vegan-friendly. It only requires one small, extra step.
Instead of using eggs, you’ll replace them with aquafaba. If you aren’t familiar with aquafaba, it is the liquid from a can of chickpeas. Sounds crazy, right? Well, when this liquid is whipped, it forms peaks just like egg whites do. In fact, they are often used in baking and other recipes to completely replace eggs or egg whites!
To make this homemade mayonnaise vegan, simply replace the eggs with 1/2 cup of aquafaba by opening a can of chickpeas and separating out the liquid. Then, add it to the cup of your immersion blender, and continue the recipe as instructed. It’s that simple!
How to Make The Best Homemade Mayo in Only One Minute
While this recipe comes together quickly, it’s important to pay close attention to these steps and FOLLOW THEM EXACTLY. Despite this recipe being so simple and easy, it’s crucial to follow the steps exactly as they’re written out. Otherwise, your mayo may not turn out properly. Don’t say I didn’t warn you!
The first thing to note is that you will NEED an immersion blender (or stick blender, as it’s sometimes called). This recipe does not work without it. No, you cannot use a food processor or a conventional blender. It MUST be an immersion blender!
Start by adding all of your ingredients to the cup of your immersion blender, and let sit for a few minutes until they start to settle together. If your immersion blender didn’t come with a cup, then it’s important to use a cup that is only slightly larger than the blender itself. The blender needs to be able to tightly fit into the cup, in order for this recipe to emulsify properly. If you use a cup that is too big, this recipe will not work.
Next, take your immersion blender and place it into the cup, making sure that it is firmly against the bottom of the cup. This is VERY important – the blender must be touching the bottom of the cup!
Turn your blender on, and DO NOT let it move for approximately 10-15 seconds. It’s important that your blender remains as still as possible during this time. Once you see the mayonnaise begin to emulsify, then (and ONLY then), you can move the stick up and down the length of the cup, to fully combine the ingredients.
Once your ingredients are fully combined, remove your blender, taste, and adjust salt / mustard until your desired taste is achieved. Store in an airtight container in the fridge, and enjoy!

Tips for Achieving the Perfect Homemade Mayonnaise, Every Time
As you can see, the process to making this homemade mayonnaise is super simple and easy! However, no matter how simple a recipe is, there is still troubleshooting that sometimes needs to happen.
Here are a few tips to help ensure that your mayonnaise turns out perfectly, every time:
- I said it before, and I’ll say it again: make sure to use a NEUTRAL oil in this recipe. It is the key to getting this recipe to work properly! I recommend also using a high-quality oil too, like avocado oil, to achieve the best flavor.
- If you are worried about consuming raw eggs, you can use pasteurized eggs in this recipe. Any eggs work! It’s all about what feels best to you.
- As mentioned in the instructions, be sure to not move the immersion blender for the first 10-15 seconds of blending. I can’t express enough how important it is the immersion blender remains as still as possible. Even a slight agitation can throw off this recipe!
- Use your immersion blender on “high” speed. We want our mayo to really be whipped! If the setting on the immersion blender is too low, it also may not emulsify properly.
- Note again that this recipe does NOT work with a food processor or a conventional blender. I’m sorry, but you need an immersion blender!
- Be sure to refrigerate your mayonnaise as soon as it’s done. Because there are no preservatives in it, it won’t last just sitting out on the counter! If stored in an airtight container in the fridge, it should stay good for up to one week.
- For an even more exciting flavor, you can grate one clove of garlic and add it into your mayo. It’s the perfect way to turn your mayonnaise into a delicious garlic aioli!

What Happens if Your Mayonnaise “Breaks”
If your mayonnaise breaks – aka, it fails to emulsify – first of all, don’t panic! It happens to all of us, and the good news is that you can probably save it.
There are two different ways that you can rescue your mayo, and try to bring it back together. Note that one yields a thinner-consistency mayonnaise, and one yields a thicker consistency, so pick the method you use according to the preference that you desire:
- Boiling Water: If you don’t mind a thinner consistency to your mayonnaise, you can try adding in one tablespoon of boiling water before immediately blending your mayonnaise again. Note that the texture will not be exactly the same, but you will still have mayo in the end!
- Egg Yolk: And if you prefer a thicker mayonnaise, then this is the tip for you! Add in one more egg yolk (JUST the yolk) to your mayonnaise and immediately re-blend. The yolk will help bind the ingredients together, creating a thick and delicious mayonnaise.
If you make this recipe, please be sure to leave a review and rating below! And, since I practically live on Instagram, be sure to tag me in your creations so that I can repost them! xx
** Photography by Gayle McLeod
Equipment
- 1 Immersion Blender This is my favorite immersion blender for this recipe!
Ingredients
- 1 Egg, room temperature
- ¼ Teaspoon Dijon Mustard
- 2 Tablespoons Lemon Juice
- 1 Pinch Sea Salt
- 1 Cup Avocado Oil
- 1 Clove Garlic, grated; this is optional!
Instructions
- Start by adding all of your ingredients to the cup of your immersion blender, and let sit for a few minutes until they start to settle together. If your immersion blender didn’t come with a cup, then it’s important to use a cup that is only slightly larger than the blender itself. The blender needs to be able to tightly fit into the cup, in order for this recipe to emulsify properly. If you use a cup that is too big, this recipe will not work.
- Next, take your immersion blender and place it into the cup, making sure that it is firmly against the bottom of the cup. This is VERY important – the blender must be touching the bottom of the cup!
- Turn your blender on, and DO NOT let it move for approximately 10-15 seconds. It’s important that your blender remains as still as possible during this time.
- Once you see the mayonnaise begin to emulsify, then (and ONLY then), you can move the stick up and down the length of the cup, to fully combine the ingredients.
- Once your ingredients are fully combined, remove your blender, taste, and adjust salt / mustard until your desired taste is achieved.
- Store in an airtight container in the fridge for up to one week, and enjoy!
Recipe In Action


Rate & review
SELECT A RATING and tell me what you think!
What others are saying
yummy and easy! I happen to like store bought mayo but I’m always willing to try to make something homemade. I had some leftover of this mayo and leftover pesto and mixed them together one night for a pasta dressing. It was great!
I am so glad you enjoyed this recipe, Jules! Thank you so much for making it and for leaving such a kind review!
Success! So easy with the immersion blender! We used grape seed oil instead of avocado.
I’m so glad it turned out well for you, Jacki! Thank you so much for making it, and for leaving such a kind review!
Excellent, very useful!
I am so happy to hear that, Dru! Thank you for your review!
Absolutely magic!!! So glad I ran out of store bought and searched to make what I needed for a recipe last week! Making 2nd batch now! Question: thoughts on mct oil for some of the oil amount? I bought thinking to put in smoothies, low carb, after reading some. Have hardly used it.
Hi Marsha! I would not recommend MCT oil in this recipe.
This was easy to make, but it was a little tart. Next time, I will cut back on lemon and add some vinegar.
Definitely adjust the recipe to your liking, Carolyn! Thank you for your review!
This worked exactly as written, thanks!
Simple, quick, and delicious!
So happy to hear that! Thank you, David!