
Creamy, chocolatey cheesecake bars that are gluten-free, dairy-free, refined sugar-free, and vegan. This healthier twist on cheesecake is the answer to all of your dessert dreams.
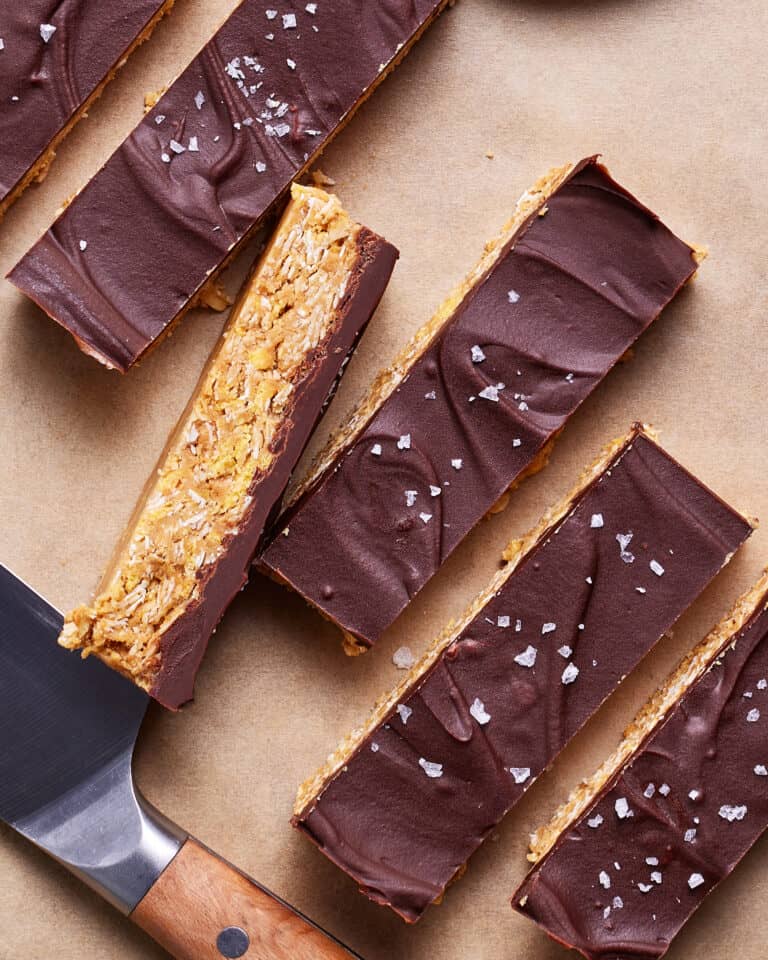
I have a confession to make: I love cheesecake, but it doesn’t really love me back. It’s delicious, but it’s a heavy dessert that never really sits well in my stomach, which led me to create these delicious Creamy Chocolate Cheesecake Bars that taste great and that don’t upset my stomach. And, not only are they made with a crushed almond crust that’s more nutritious than a traditional graham cracker base, the chocolate “cheesecake” layer contains no cream cheese. Instead, it tastes like creamy fudge pudding, but more dense.

I used to love walking into the Cheesecake Factory and looking at the cases full of all of the different types of cheesecake. From fruit cheesecakes to peanut butter cheesecakes to classic New York style, I loved all types. But by far my favorite was chocolate. Rich dark chocolate folded into the creamy cheese was the perfect combination, in my opinion.
So, after I recovered from my eating disorder and began embarking on a healthier lifestyle, I knew that chocolate cheesecake was something that I needed to recreate. And let me tell you, this version definitely does NOT disappoint!
One look at these chocolate cheesecake bars, and you would be hard-pressed to believe that these are healthy. I mean, just look at all that melty chocolate! But lo and behold, these bars ARE healthy, and are free of gluten, dairy, refined sugar, and yes, cheese. These are cheese-less cheesecake bars, but don’t let that stop you from trying them out. You won’t miss the cheese one bit- promise.

What you need to make these chocolate cheesecake bars
This may look like a long list of ingredients, but the good news is, there’s nothing too crazy here! Most of these are pantry staples, and can be used in a variety of different recipes, like my Paleo Lemon Loaf, Best Double Fudge Soft Baked Cookies, or my Healthy Pumpkin Fudge Brownies.
- Almonds: These will become the base of your chocolate crust! You can also use cashews here instead.
- Shredded Coconut: Make sure that you choose unsweetened coconut to keep this refined-sugar free.
- Medjool Dates: This will be the natural sweetener in the crust! Medjool dates are a Middle Eastern superfood and add a rich, natural sweetness to any recipe.
- Unsweetened Cocoa Powder: This will give our crust that chocolatey flavor! Definitely make sure you choose unsweetened cocoa powder over sweetened, so your crust doesn’t turn out too sweet.
- Vanilla Extract: Pure vanilla extract is essential to any good dessert, and is the perfect balance to the chocolate.
- Coconut Oil: For the filling in particular, you’ll want to make sure you use refined coconut oil.
- Cashews: Did you know that when blended, cashews can become creamy and dare I say, a great dairy-free replacement for cheese? Yep! Don’t knock it until you try it. The cashews will become the base for our cheesecake filling.
- Almond Milk: You can also substitute this with your favorite plant-based milk!
- Maple Syrup: If you’ve followed my recipes for a while, then you’ll know that I love using maple syrup in my desserts. It’s so sweet and the perfect way to replace refined sugar without sacrificing flavor!


How to make the cheesecake filling
In order to make the filling, all you’ll want to do is add your cashews, almond milk, maple syrup, coconut oil, unsweetened cocoa powder, and salt to a high-speed blender until it’s smooth and liquid-y. The key here is to make sure that your cashews are soaked overnight (or boiled for at least 20 minutes) so they are soft and blend easily. This also makes them easier to digest, which can help prevent bloating – Yay!
By the time you make the filling the crust should be done and chilling in the fridge. So, simply pour your filling mixture on the crust, freeze for 45 minutes, and slice once hardened!
It’s a LOT easier than it seems, and as long as you have access to a blender and a fridge, this recipe becomes a piece of [cheese] cake!

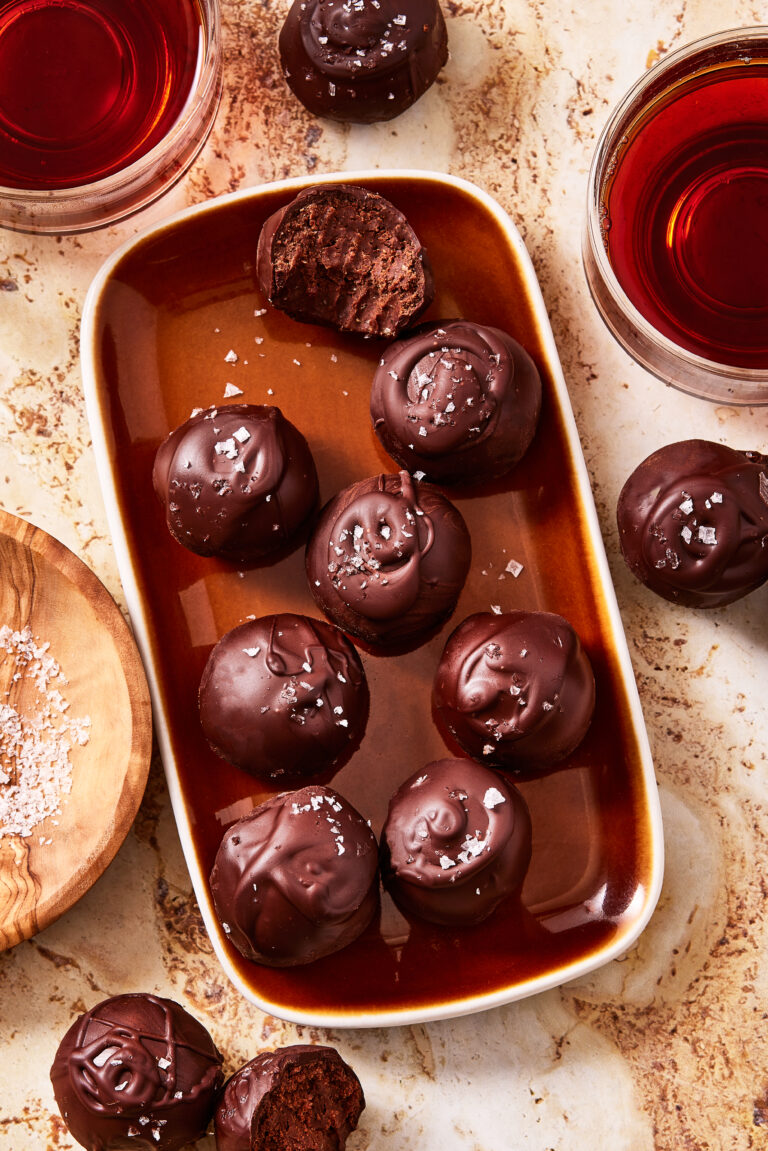
Before serving, feel free to garnish your cheesecake bars with whatever you would like! Some toppings that I love include melted chocolate, yogurt, vanilla ice cream, whipped cream, Maldon flaky salt, and chocolate shavings! The opportunities are truly endless.
How to store these chocolate cheesecake bars
Just like regular cheesecake, these chocolate cheesecake bars should be kept in the fridge in a sealed container. You can eat these straight from the fridge, though! These bars will keep for one week, but I sincerely doubt they’ll last until then. You can also freeze them in a sealed container for up to 3 months. When you are ready to eat them, just let thaw until the desired temperature is reached.
If you make this recipe, please be sure to leave a rating and a comment below – this really helps others decide whether to make this recipe as well. And since I practically live on Instagram, be sure to tag me in your creations so I can see them and repost! Enjoy!
Ingredients
For the Chocolate Crust:
- 1 cup Raw Almonds, can also substitute for cashews
- ¾ cup Finely Shredded Coconut, unsweetened
- 1 cup Medjool Dates, pitted
- ⅓ cup Unsweetened Cocoa Powder
- ½ teaspoon Salt
- 1 teaspoon Vanilla
- 3 tablespoons Coconut Oil, melted
For the Chocolate Filling:
- 1 cup Raw Cashews, soaked overnight or in boiling hot water for 20 minutes
- ⅔ cup Almond Milk OR Non-Dairy Milk
- ½ cup Maple Syrup
- ¾ cup Refined Coconut Oil, melted
- ¼ cup Unsweetened Cocoa Powder
- ¼ teaspoon Salt
Instructions
- Grease an 8×8 square baking dish well, then add parchment paper, so that the bars are easy to pull out.
- In a food processor, add the almonds. Process on high until the almonds are finely chopped, about one minute.
- Add remaining ingredients, and process for another minute or so, until a sticky paste forms. If it is super dry, add a tablespoon of water. Transfer the mixture to the baking dish and use your hands to press it down evenly.
- Place the dish into the fridge.
- Next, make the chocolate filling.
- Add all ingredients into a high speed blender, and blend until the mixture is nice and creamy. You might have to scrape down the sides a few times, to fully incorporate.
- Remove dish from the fridge, and pour mixture on top of the crust, using a spatula or knife to make sure there are no air bubbles.
- Freeze for 45 minutes.
- Slice into 12 squares and enjoy!
Rate & review
SELECT A RATING and tell me what you think!
What others are saying
Every year on May 23rd I make my husband a heart shaped cake, commemorating his open heart surgery in 2016. This year I used your recipe and it was so delicious, everyone enjoyed it. This is definitely a keeper!
Truly this touched me! I am so happy you made these to commemorate his heart surgery! Sending all the love and healing vibes!
I would give this 20 stars if I could. The crust alone is a solid 15! This was so easy to put together & the filling was so creamy my husband wondered if it was ice cream! SUCCESS!!! Thank you so much, Nicole! Beautiful presentation, too. Another keeper!
Yay!! Thank you so much for the sweet review, Jennifer this made my day!